iRobo.ControlPanel.Add Schedule
Add Schedule page allows the user to add a schedule in Scheduled Job in the iRobo system.
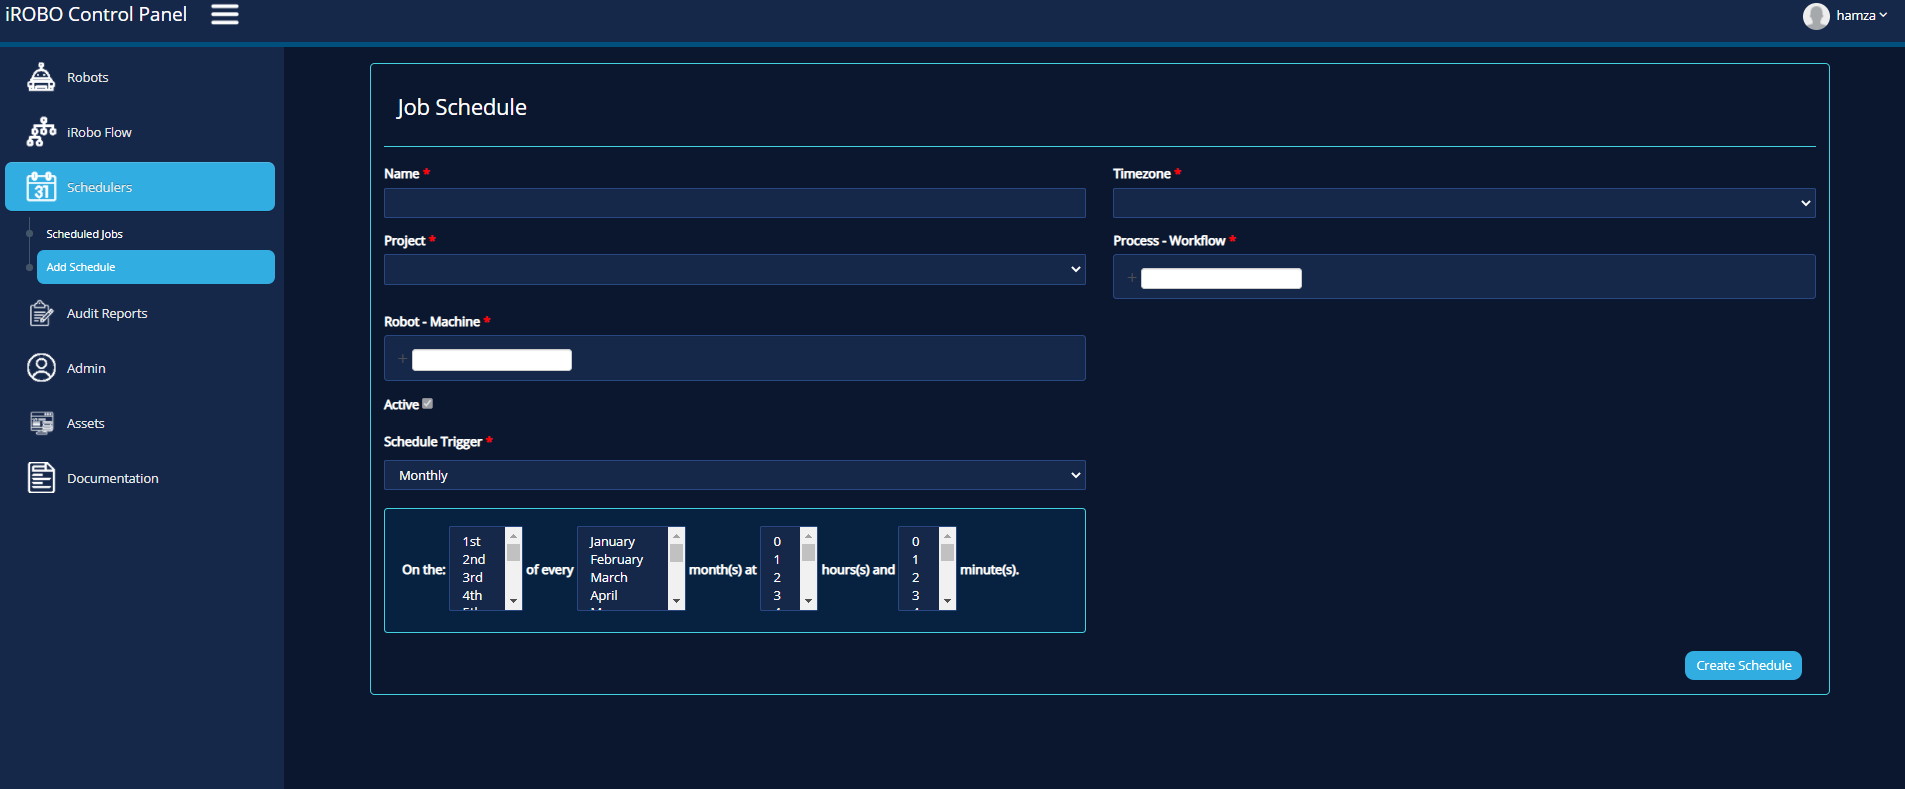
iRobo Add Schedule Screen
- Click on Schedulers from iRobo Menu.
- Then click on Add Schedule from Schedulers in iRobo Menu. The schedule page appears to allow the user to add a schedule to Scheduled Job.
- Name: enter job name.
- TimeZone: enter your TimeZone.
- Project: select project name.
- Process - Workflow: select workflow created in iRobo Studio from list.
- Robot - Machine: select Robot machine using iRobo Studio.
- Active: mark checkbox to make the scheduled job running on the selected Robot.
|
If the checkbox is unmarked, then the Scheduled Job becomes Deactive. Deactive means the job is scheduled but not running. |
- Select Time interval from the list to run the Scheduled job at the specified time; Minute, Hourly, Daily, Weekly, Monthly, or Yearly.
- On Selecting Monthly in the previous step, specify Day, Month, Hour, and Minutes to run the Scheduled job.
- Click Create Schedule button: schedule is saved and added to Scheduled Job list in Scheduled Job Page.
Created with the Personal Edition of HelpNDoc: Free HTML Help documentation generator