User.Interface
Click on the iRobo Studio icon  , to start using iRobo Studio.
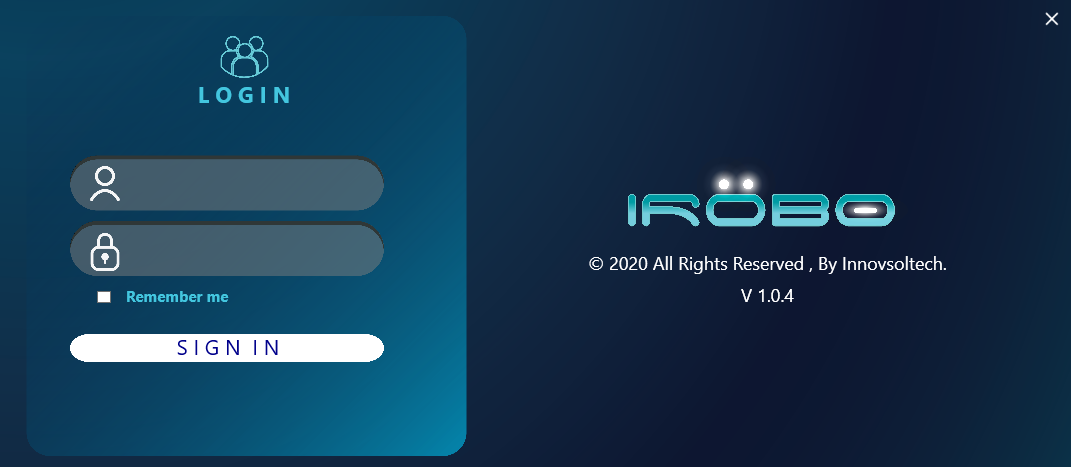
iRobo Studio Login Screen
Login: enter username and password, then click Sign In to log into the system.
Remember me: mark checkbox; to save login credentials.
iRobo Studio
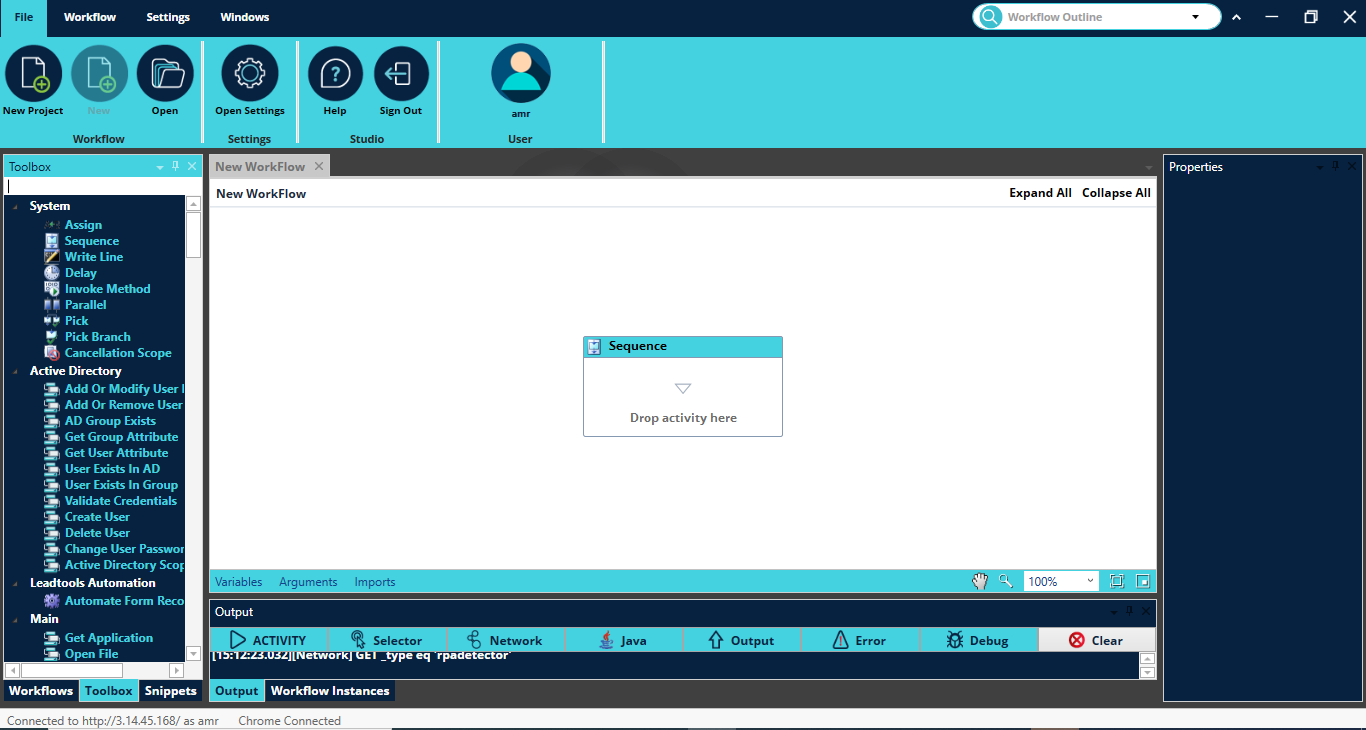
iRobo Studio main screen opens allows the user to start building the business automated processes.
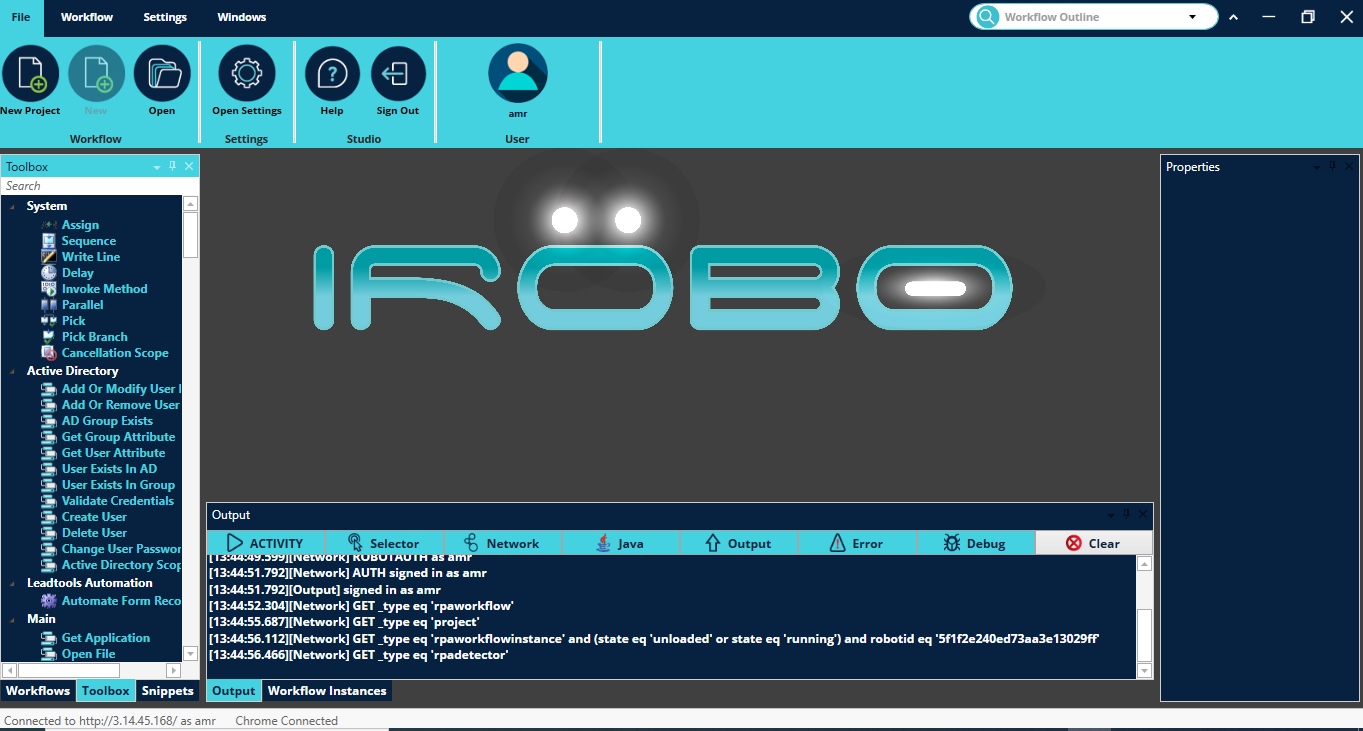
iRobo Studio main Screen
|
In the Output Panel, a message appears notifying the user that iRobo Studio is connected. If the "Connected to" message does not appear in iRobo bar, then the user account is not properly logged to the system. To check iRobo Studio connectivity, go to Installation Steps page to check Settings and Configurations. |
Toolbox
It composes various activities used for all types of automation like; invoice processing, office and mail automation, PDF, file and image processing, web automation and computer vision.
Click on Toolbox Panel or Workflows Panel to switch between panels.
|
Activities: composes desktop application automation, web scrabbling and web automation, Citrix automation, OCR capabilities,Excel and PDF processing, Computer Vision and Intelligent Image Processing, automation related to Outlook. |
Drag and drop any activity to the Sequence to be used, as shown in the image below. This middle area is your canvas where you are able to build your automation process.
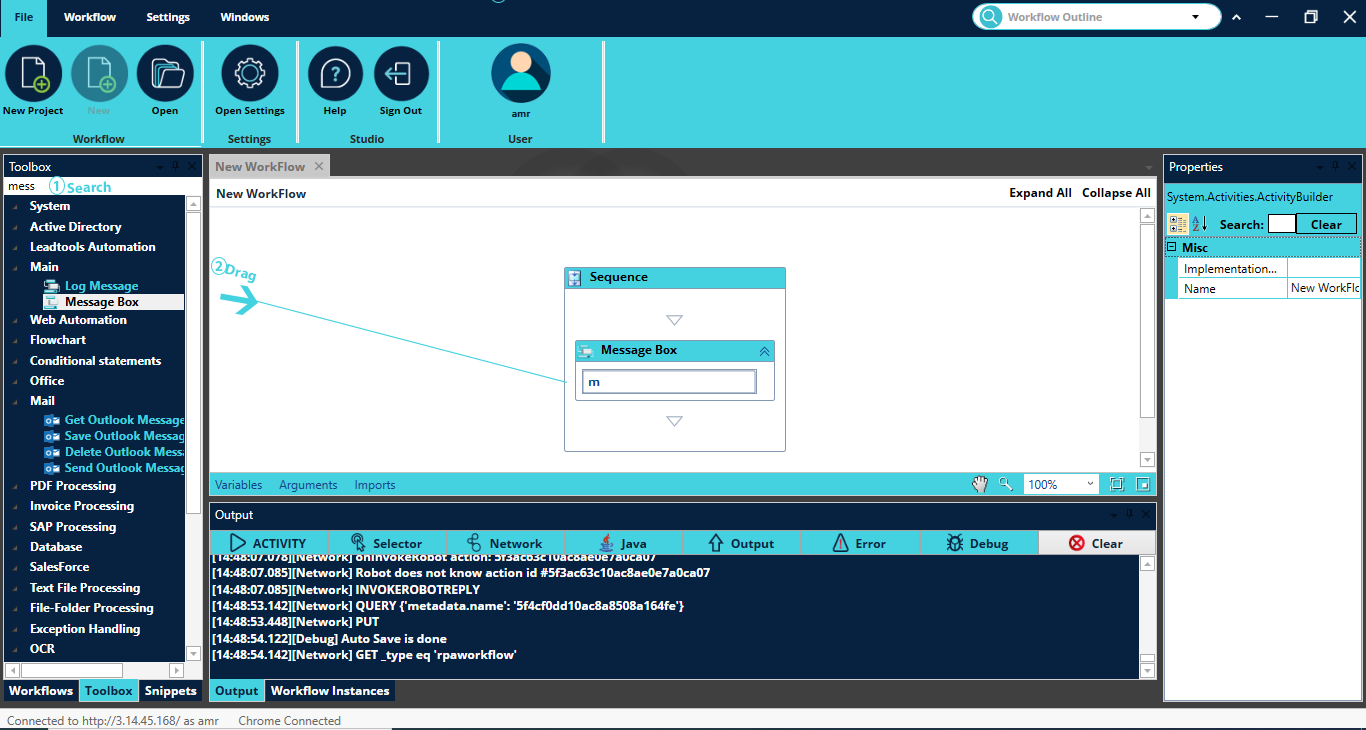
iRobo Studio Workflow Screen
|
Sequence: is a simple linear representation of activities that runs from top to bottom. It is best used for simple scenarios when activities follow each other smoothly. For example, Sequence is used in UI automation when typing/click/keystroke happens. |
Snippets
It's a list of ready made workflows that shows the most common tasks in iRobo.
To use any of the workflows, double click on it, workflow is opened as shown in the image below.
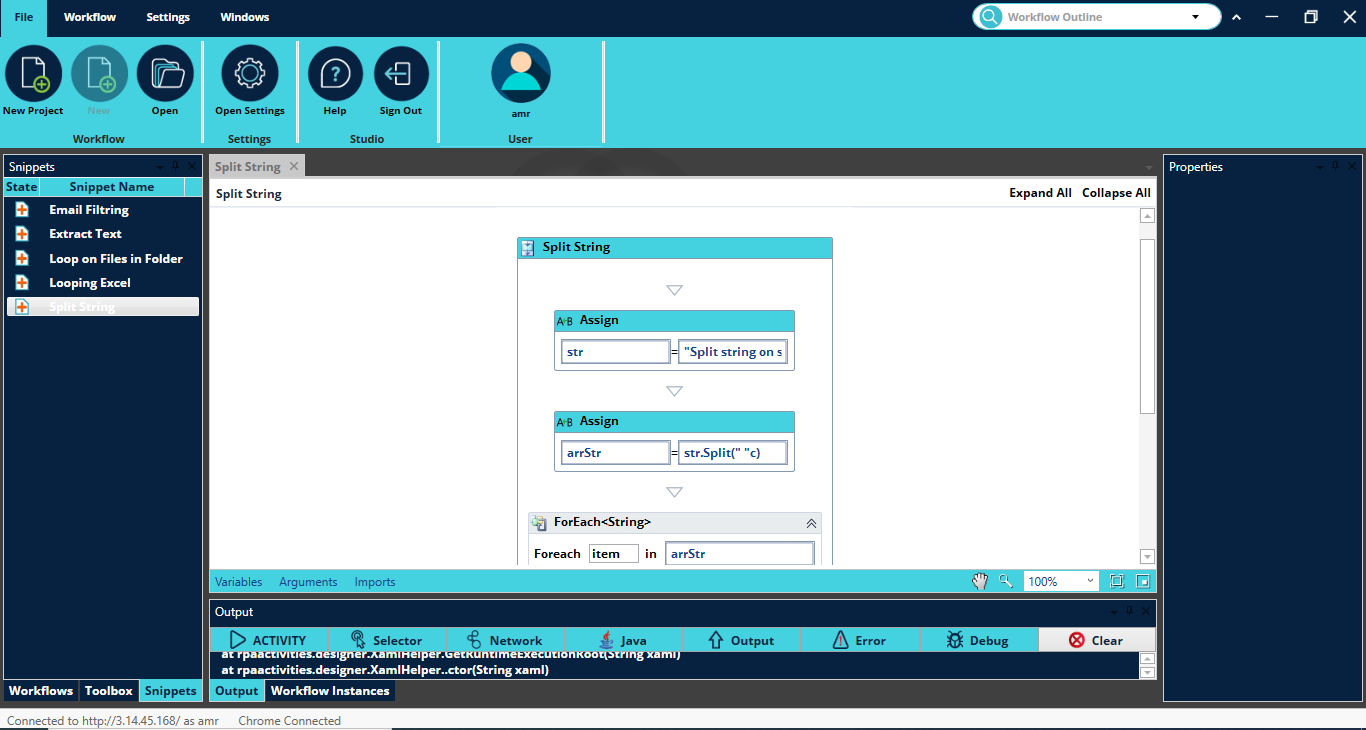
iRobo Studio Snippets Screen
Properties Panel
It contains properties and settings of each activity.
Output Panel
It is used to trace and watch every action the Studio is doing; like which activity is running now and any errors occurs while running this activity.
Toolbar
It contains command buttons with which you can access commands; like record, play, copy and save Workflows.
It also have all Studio settings. It provides the following functionalities; creating and editing Workflows, recording of user's Workflows, desktop application automation, web scrabbling and web automation, Citrix automation, OCR capabilities, Excel and PDF processing, Computer Vision and Intelligent Image processing, automation related to Outlook.
Toolbar/ File Tab
Toolbar/ File Tab /Workflow Section
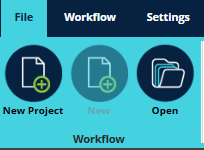
Click on ![]() New Project button: to create a new Project to hold a Workflow(s) as shown in the image below. The Project holds your automation in a Workflow.
New Project button: to create a new Project to hold a Workflow(s) as shown in the image below. The Project holds your automation in a Workflow.
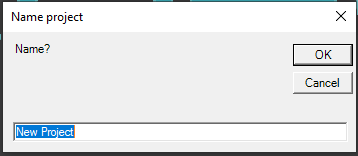
Enter Project Name, then click Ok button, iRobo Studio main screen is opened with a New Workflow as show in the image below.
iRobo Studio Workflow Screen
Click on ![]() New button: to create a new Workflow within the selected Project as shown in the image below.
New button: to create a new Workflow within the selected Project as shown in the image below.
iRobo Studio Workflow Screen
Click on ![]() Open button: opens a Project/ Workflow within a Project.
Open button: opens a Project/ Workflow within a Project.
Toolbar/ File Tab /Settings Section

Click on Open Settings button: open iRobo Studio settings file in .jason format, as shown in the image below.
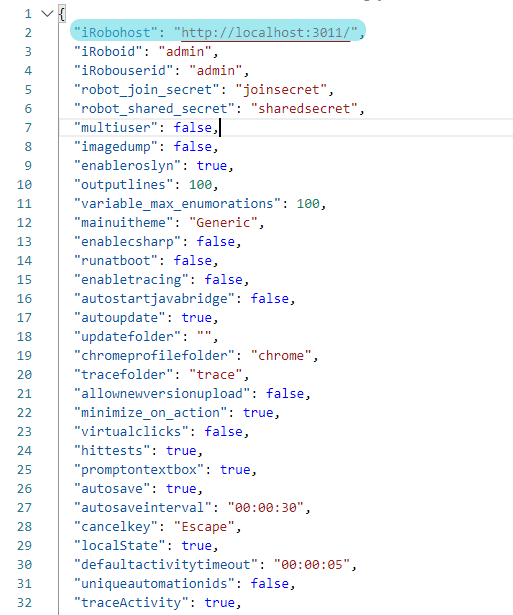
iRobo Studio Setting File image
Username/ Password
Change Application Password (iRoboid) to admin and Application UserID (iRobouserid) to admin; which is the default username and password as shown in the above image.
|
For more information about Settings Configuration, go to Installation Steps Page. |
Toolbar/ File Tab /Studio Section
Click on ![]() Help button: Studio Help is opened.
Help button: Studio Help is opened.
Click on ![]() Sign Out button: exits iRobo Studio.
Sign Out button: exits iRobo Studio.
Toolbar/ File Tab /User Section
![]()
Logged iRobo User Account appears.
Toolbar/ Workflow Tab
Toolbar/ Workflow Tab/ File Section
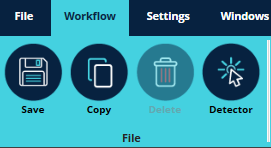
Click on ![]() Save button: to save Workflow.
Save button: to save Workflow.
Click on ![]() Copy button: to copy Workflow.
Copy button: to copy Workflow.
Click on ![]() Delete button: to delete selected item; Activity, Sequence or Workflow.
Delete button: to delete selected item; Activity, Sequence or Workflow.
|
Delete button is activated only when an item is selected. |
Click on ![]() Detector button: open Manage Detectors Window, as shown in the image below.
Detector button: open Manage Detectors Window, as shown in the image below.
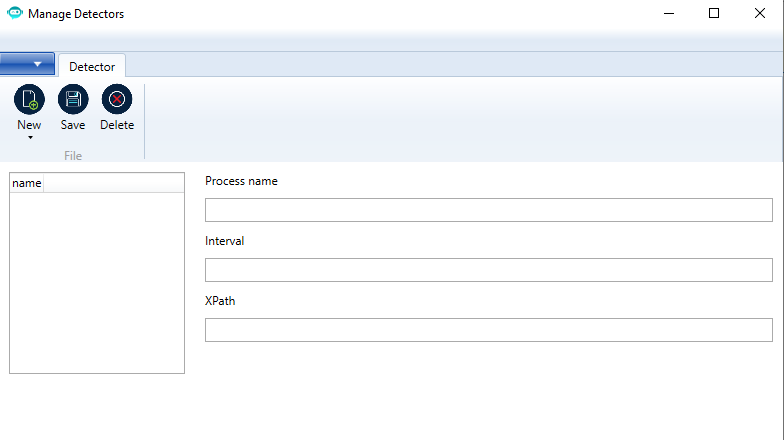
Manage Detector Screen
|
For more information on how to use Detector, go to Event Detector Activity Page. |
Toolbar/ Workflow Tab/ Runtime Section
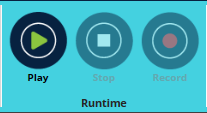
Click on ![]() Play button: to run the automated process of the debugged activities in the Workflow which appears in the Output Panel as shown in the image below.
Play button: to run the automated process of the debugged activities in the Workflow which appears in the Output Panel as shown in the image below.
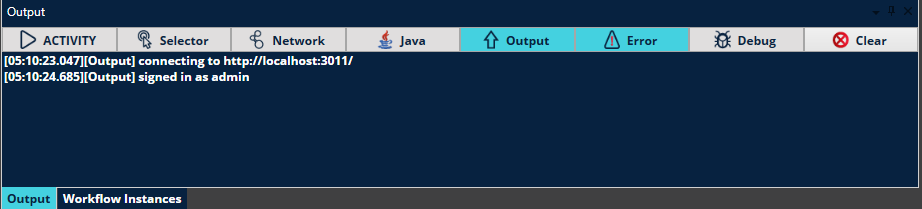
iRobo Studio Output Panel Screen
Click on ![]() Clear button (from Output Panel): to clear Output Panel data.
Clear button (from Output Panel): to clear Output Panel data.
Record: is a recording tool that records user actions and turn it into a working Workflow; such as desktop application automation, web scrabbling and web automation.
Click on ![]() Record button: to start recording user's action.
Record button: to start recording user's action.
Click on ![]() Stop button: to stop recording user's action.
Stop button: to stop recording user's action.
|
Stop button is activated only when the user start recording an automated process. |
Toolbar/ Workflow Tab/ Play Settings Section
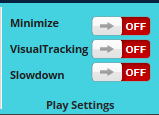
Click on  ON button: to activate this setting.
Click on  OFF button: to deactivate this setting.
Minimize: minimize iRobo on running the automated process.
VisualTracking: to highlight the Element that is on action.
Slowdown: to slowdown running Activities in a Workflow.
Toolbar/ Workflow Tab/ Ship In/Out Section
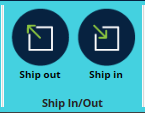
Click on ![]() Ship Out button: to export Workflow in .xaml extension.
Ship Out button: to export Workflow in .xaml extension.
Click on ![]() Ship In button: to import saved Workflow in .xaml extension.
Ship In button: to import saved Workflow in .xaml extension.
Toolbar/ Workflow Tab/ Instances Section
Click on Clear Log button: to clear log files.
Toolbar/ Settings Tab
Toolbar/ Settings Tab/ Permission Section
Click on Permission button: to give permission on a selected Workflow to a specific user.
- Select Workflow first from Workflow Panel, then click on Permission, Permission Manager Screen appears as shown below.
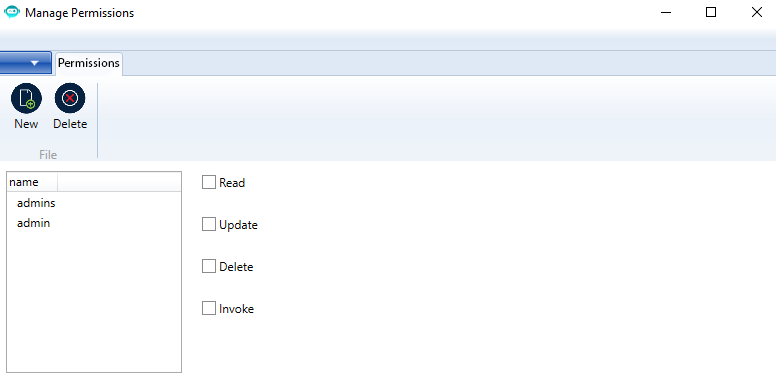
Manage Permissions Screen
- Select user account under name.
- Mark the Check-box to grant access permission on the selected user account and the selected Workflow. For example: Read, Update, Delete or Invoke.
- Permission is granted for the selected user account and the selected Workflow.
Toolbar/ Settings Tab/ Settings Section
Checkbox Run at boot: if checked, it sets the registry key to the current path.
Checkbox Image dump: if checked, saves selected Images in the activities like: Select HTML Element, Select Element, etc...
It takes a copy of the detected images and saves it in this path C:\Users\username\Pictures\img-dump
Toolbar/ Settings Tab/ Auto save Section
Checkbox Auto save: if checked, automatically saves Workflow each one minute.
Toolbar/ Settings Tab/ Recording Section
Checkbox Unique id: related to variable called "uniqueautomationids" in socket service.cs.
Checkbox Animate: smooths the mouse pointer move while running the recorded process.
Checkbox Image grayed: if it's set to True, the record only depends on Select Element Activity and not Find Image Activity to use this property.
Checkbox virtual clicks: related to variable called virtualclicks to socket service.cs.
Checkbox do hittests: if it's set to True, to be used with Select Element Activity.
Checkbox Prompt on textbox: appears when Double-Click on TextBox while recording to set its value to be added.
Toolbar/ Settings Tab/ Cancel Key Section
Click on Cancel Key button: the below screen appears allow user to select Keyboard key for cancel operation.
Enter a key to be used as a escape button, example Backspace button as shown in the image below.
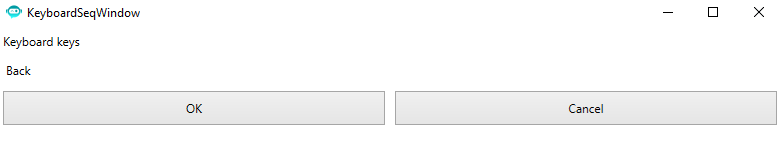
Cancel Key Screen
Toolbar/ Settings Tab/ Trace Section
Open Trace: opens the log text file that contains the recorded output logs .
Checkbox Tracing: enables the functionality of tracing the processes into an external text file.
Toolbar/ Settings Tab/ Java Section
Click on Run Bridge button: run Java Bridge for using Java Applications.
|
You should click on Run Bridge button in Settings Tab/ Java before using Java Activities. |
Checkbox Autostart: to adjust the interval of saving the workflow.
Toolbar/ Settings Tab/ SAP Section
Click on Run Bridge button: run SAP Bridge for using SAP.
|
You should click on Run Bridge button in Settings Tab/ SAP before using SAP Activities. |
Checkbox Autostart: to adjust the interval of saving the workflow.
Toolbar/ Windows Tab
Checkbox Toolbox: if checked, shows Toolbox Panel in iRobo workspace.
Checkbox Properties: if checked, shows Properties Panel in iRobo workspace.
Checkbox Workflow Instances: if checked, shows Workflow Instances Panel in iRobo workspace. It displays completed workflow data ,the user who run it, time of execution, succeed, fail or aborted.
Checkbox Workflows: if checked, shows Workflows Panel in iRobo workspace.
Checkbox Output: if checked, shows Output Panel in iRobo workspace.
|
Panels are explained in the above sections. |
Created with the Personal Edition of HelpNDoc: Free Web Help generator