SalesForce.Integration
We should set some configurations in SalesForce to create a connection that enables SaleForce to integrate with iRoboFlow.
Follow the steps below to integrate with iRoboFlow APP:
Step 1: Create new Connected App
- Login to the SalesForce website with your credentials.
- Click on Setup as shown in the image below.

- Navigate Quick Search.
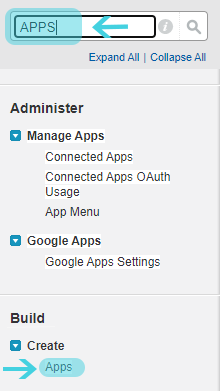
- Type APPS in the Quick Search area. Then, select Apps under Build, Create tab as shown in image below.
- Go to Settings.
- In Quick Search, search for 'Apps'.
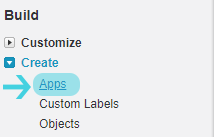
- From Build, click on 'create App' as shown in the image below.
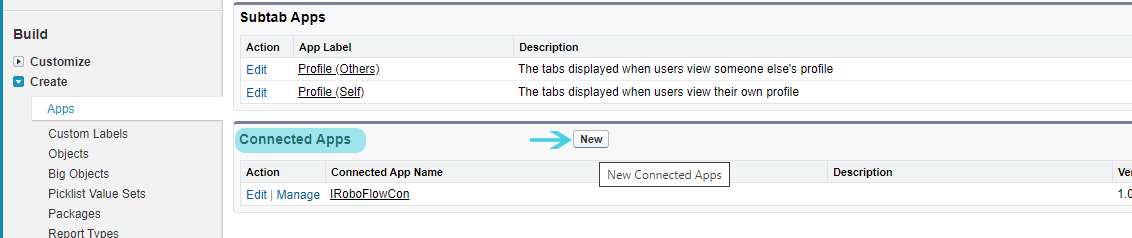
- Apps page appears, scroll down to end of the page. You'll find Connected Apps Tab, click New to create a new Connected APP.
- It forwards you to Custom APP page, enter required data as shown in the image below, then click Next button.
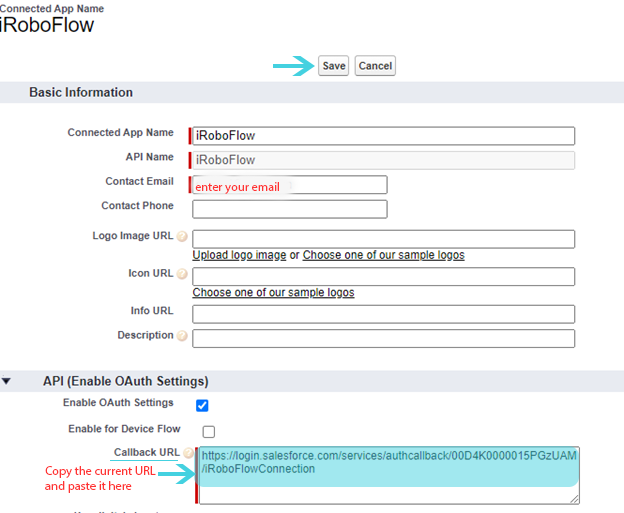
- This call back URL is copied from Auth Providers connected App. As you will be guided in steps to achieve this.
|
When you create it for first time, you will have to fill the field with below URL: http://localhost and click Save button . |
- After saving the Connected App, it appears as shown below.
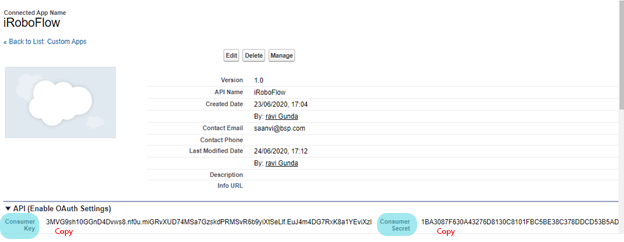
- Before we proceed in creating the Auth Provider app. Copy the Consumer Key and Consumer Secret from current created App and save it in a Notepad file for later as shown in the above image.
Step 2: Create new Auth.provider
- Now let’s create an Auth Provider app.
- Navigate HOME.
- Click on Setup as shown in the image below.
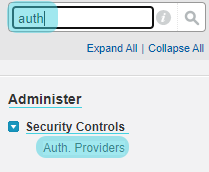
- Navigate Quick Search area.
- Type Auth in the Search Area. Then, select Auth.provider under Security controls tab as shown below.
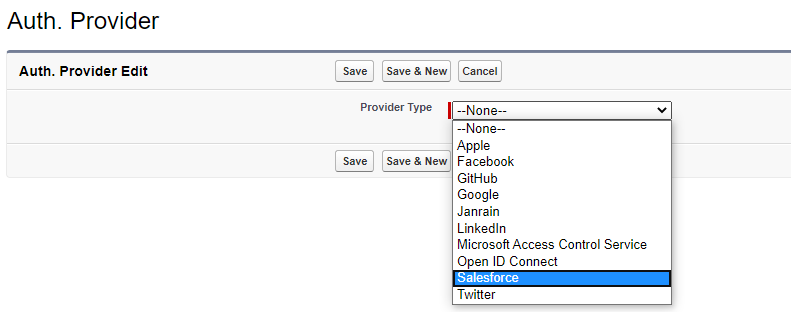
- Click on New.

- Select the Salesforce Option from drop down menu in Provider Type as shown below.
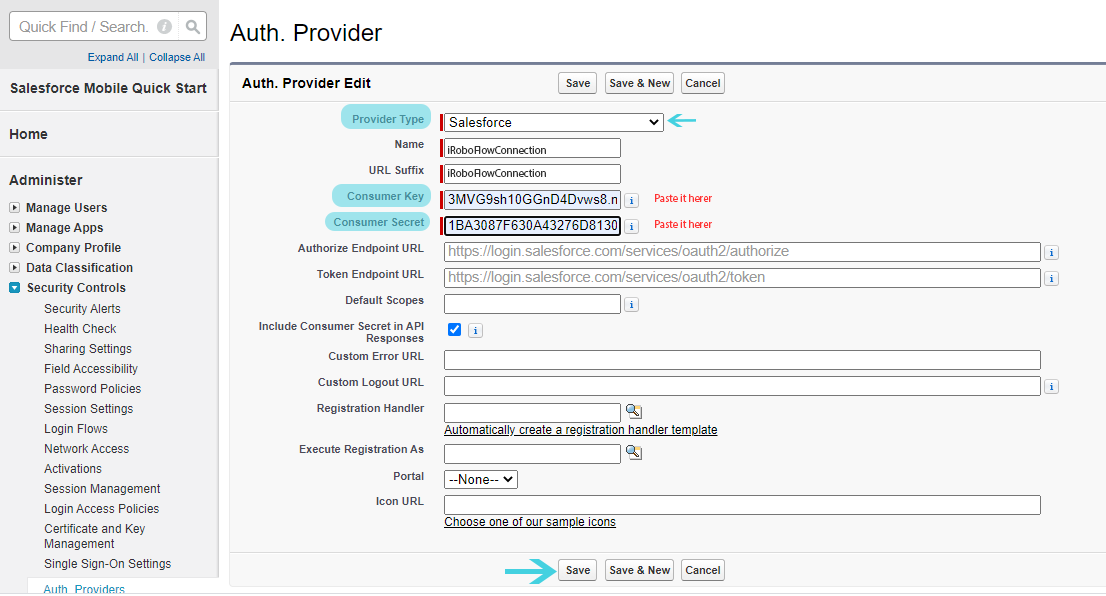
- You'll be forwarded to details page to fill the required fields as shown below. Here, provide Consumer Key and Consumer Secret in the relevant fields (you already saved in no.13 Step 1) and then click Save button.
- After saving the details, Copy the Call back URL and paste it in the first connected App we created in the call back URL field.
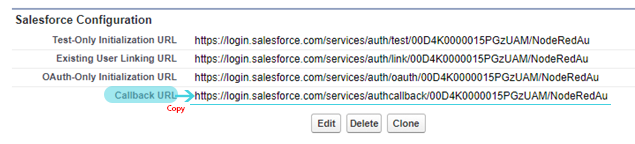
|
As mentioned, we copied the call back URL in no.5 STEP 1. |
- We are done with Auth provider connection.
- You've to go to the Connected App we've created, and add the CallBack URL and add it to the relevant field.
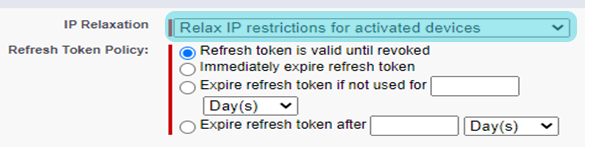
- Also, in the created connected App, edit the policies and choose the below settings.
- Now, we successfully configured all the details between the two connected apps.
Step 3: Create new Named Credentials
- Let’s create a Named Credentials App. To begin this, we have to follow the same steps from above.
- Navigate HOME, and then click Setup.
- Navigate Quick Search area.
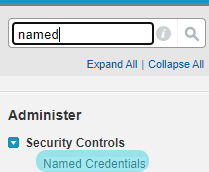
- Type Named credentials in the Search area. Then, select Named credentials under Security controls tab as shown below.
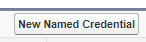
- Click new Named credentials.
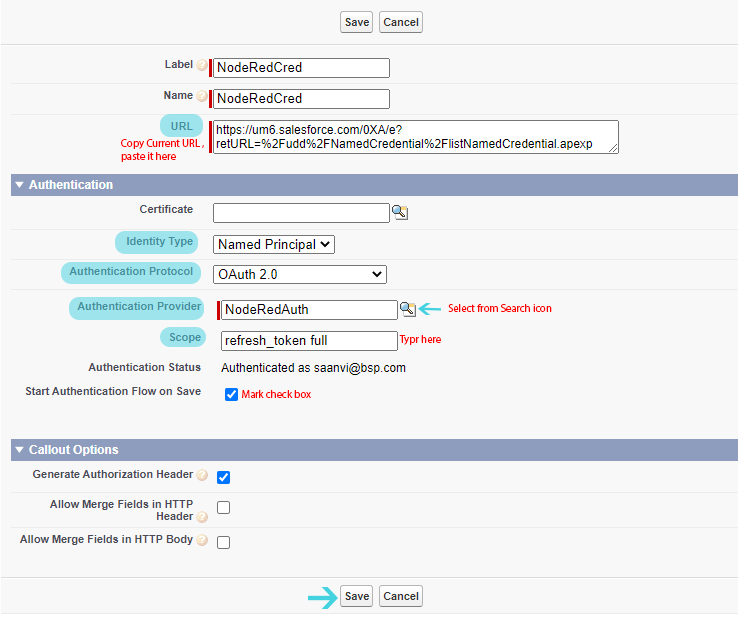
- We should provide all the necessary fields like the image below.
- Under Authentication provider field, click the search icon as it will take you to the created connected App, so select it accordingly.
- Under Scope field, type refresh_token full. Finally, click Save button to finish the configuration.
- After saving, sometimes you might face error message like below.

- In order to resolve that issue, just go to the created connected App and then edit the policies. And choose the below settings.
- Give it 20 – 30 minutes to activate the services.
- After that, go to named credentials the one you created and click save button. So, it will navigate to login screen. Just provide the username and password details and accept allow the following pop ups conditions.
- Now, you are done with integration process.
|
To configure created iRobFlow integration in SalesForce node, go to SalesForce Connection page. |
Created with the Personal Edition of HelpNDoc: Easily create Help documents