SalesForce.iRobo.Flow.Connection
After configuring SaleForce integration with iRoboFlow. Let's see how to set these configurations in SalesForce Node.
Let's check out the steps below:
- Double- click on SalesForce node.
- In its Properties, select Add new Connection-config from Connection field. Then click on edit button next to it as shown in the image below.
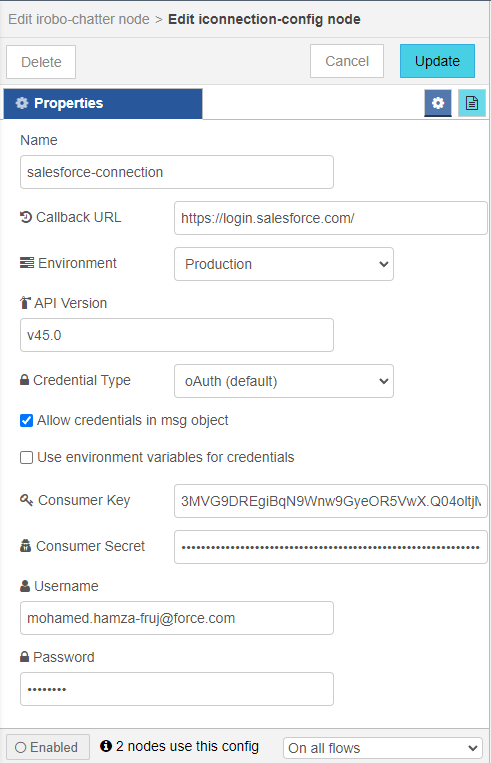
- Add new connection-config node Properties appear as shown in the image below.
- Now, go to Connected Apps in SalesForce to copy Some data from the connection you've created to add it to Properties as shown in the image below.

|
For more information on Connection, go to SalesForce Integration page. |
- Click on the iRoboFlowCon we've created in Connected Apps. iRoboFlowCon data appears as shown in the image below.
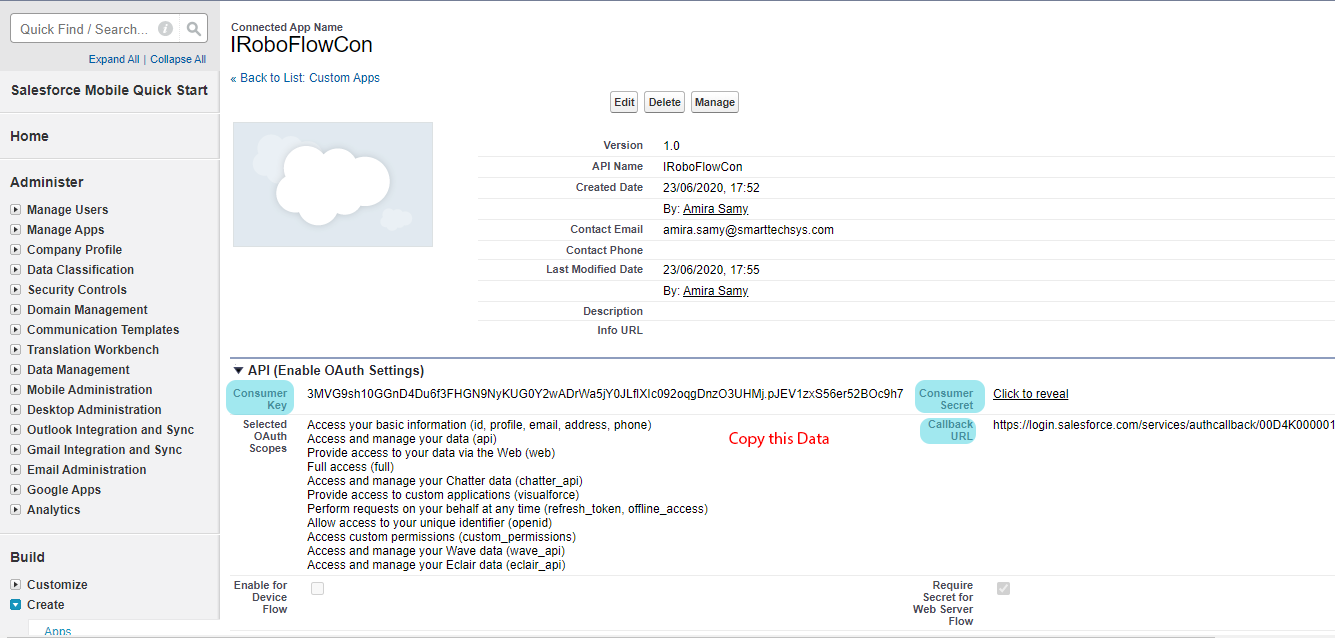
- From iRoboFlowCon, copy Consumer Key, Consumer Secret (click to reveal) and Calback URL.
- Go to Add new connection-config node Properties in Step no.3, and paste this data each in its relevant field.
- Also add your User name and Password SalesForce credentials in Add new connection-config node Properties in Step no.3.
- Then, click Add button in Add new connection-config node Properties in Step no.3, to add this connection to SalesForce Connection field.
- Back to SalesForce node Properties in Step no.2.
- Select iRoboFlowCon, the connection we've just created from Connection field then click Done button as shown in the image below.
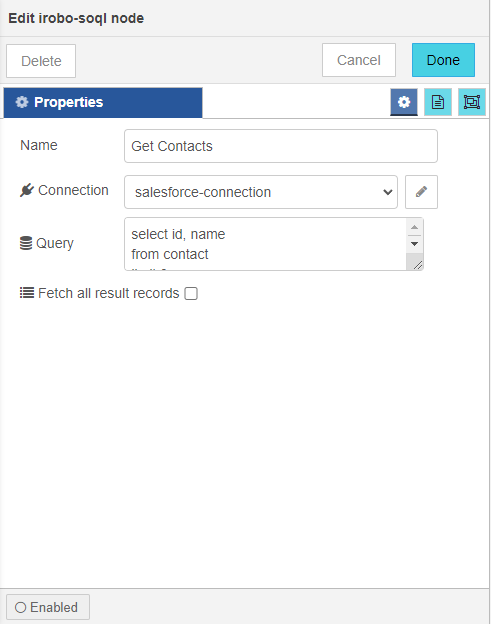
- Finally, the SalesForce connection is set for the SaleForce node.
- Now, you can create your workflow and start integrating with SalesForce.
Created with the Personal Edition of HelpNDoc: Full-featured Documentation generator